Creating & Launching an EIB Integration The Enterprise Interface Builder is used to create, configure and launch simple interface background processes.
There are 4 steps in creating, configuring and launching an enterprise interface (please note that these screenshots are just an introduction, and not an activity; the activity follows in a few pages):
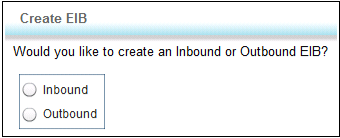
- Create EIB: Search for the Create EIB task. Specify Inbound or Outbound, and then continue to the Configuration Wizard to specify the values for the 3-step pattern.
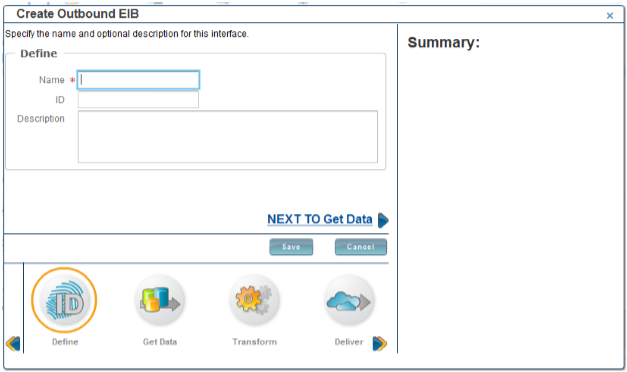
- Configure Integration System: After giving it a name, configure your EIB 3-step pattern by specifying a data source, an optional transformation, and a transport protocol.
- Launch Integration System: Navigation to the Launch task is through the Integration System related action icon and choosing Integration > Launch / Schedule.
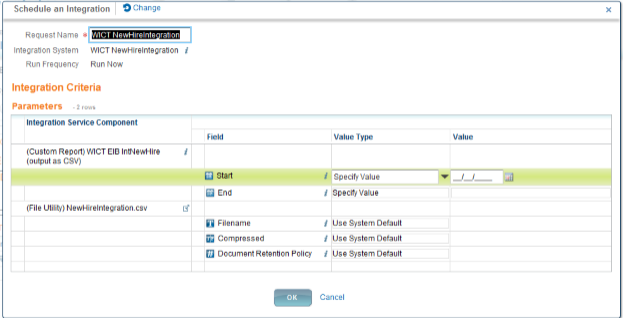
- When an Integration System is launched any required prompts related to a custom report must be populated.
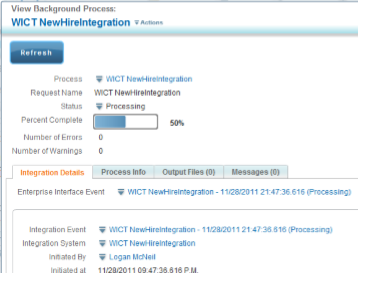
- View Background Process Event: Once you launch the Enterprise Interface you will be transferred directly to the View Background Process page.
- Click the Refresh button on this page until you see the Status change from Processing:
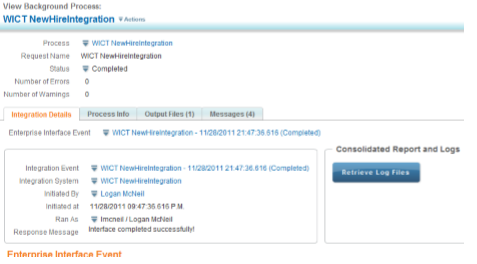
- If there are no errors, the Status will change to Completed, and the Output Files tab will contain the output file (if Workday attachment was the configured Transport Protocol):
- At a later time, to return to this page, search for Process Monitor (run it, and click the link in the Request column) or for Integration Events (run it, and click the link in the Integration Event column.)
Activity 3—Create an Employee New Hire EIB Scenario:
You have been tasked with utilizing the “WICT EIB Int New Hire” Custom Report in a simple integration. The HR department has requested a comma separated file of all transfers within GMS. They have requested the ability to run it once/per week with a given date range.
Tasks to Use Create Integration System
Steps: Create Integration System Activities
1. Search for EIB
2. Select the Create EIB task
3. Select the Outbound radio button and click the OK button
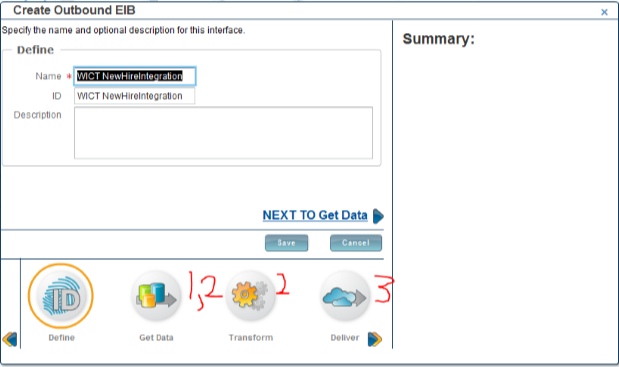
4. Name the EIB as follows:
| Field Name | Entry Value |
| Name | WICT New Hire Integration |
| Comments | *Enter any comments you wish |
Select Data Source
5. Click on the Get Data icon ![]() at the bottom left of the screen
at the bottom left of the screen
6. Click on the Custom Report radio button
7. Click on the ![]() Icon and choose your report (WICT EIB Int New hire)
Icon and choose your report (WICT EIB Int New hire)
8. On this same page, under Custom Report Options, in the Alternate Output Format dropdown, select CSV Select Transport Protocol
9. Click on the Deliver icon  at the bottom of the screen
10. Click on the Send results back to Workday as an Attachment radio button
11. Provide a filename of NewHireIntegration.csv (*you must name the file with an extension)
12. Specify a Document Retention Policy to something other than the 0-default value
13. Click the Save button
14. Click the Close button to bypass the confirmation page Launch Enterprise Interface Activities
15. Search for int sys, and run the View Integration System report
16. Select your “WICT New Hire Integration” Integration System and click OK
17. Click the related action icon on the “WICT New Hire Integration” Integration System
18. Select the Integration > Launch /Schedule related action
19. Observe the default Run Frequency value of Run Now. Do not change this default value.
20. Click the OK button
21. You will be prompted for the Report Parameters.
Enter values as follows:
| Field Name | Entry Value |
| Start Date | Monday’s Date (of this week) |
| End Date | Friday’s Date (of this week) |
22. Click the OK button to Launch the integration Background Process Event Activities
23. Once you launch the “NewHireIntegration” Integration System you will be transferred to the View Background Process page
24. Click on the “WICT NewHireIntegration” link (blue text) at the top, or the Refresh button, to refresh the page
25. Scroll down while on the Integration Details tab
26. At the bottom of the page click on the Document hyperlinked .csv file (under the Name (Workday Attachment)) to download the csv file
27. Explore the other tabs (the .csv file is also available from the Output Files (1) tab) Process Monitor Activities
28. Search for Process Monitor
29. Execute the Process Monitor Report by clicking on the hyperlink
30. Accept the default values, click OK
31. Click on the Request hyperlink for your event
32. You will then be transferred to the same event details (View Background Process) page previously explored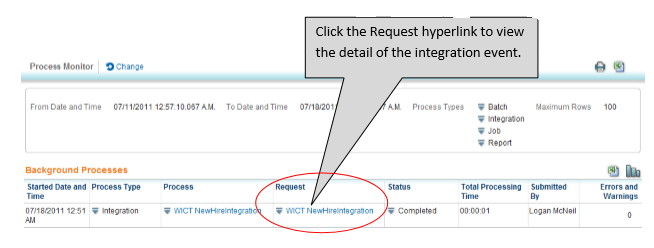 33. Search for Int Eve
34. Execute the Integration Events Report by clicking on the hyperlink
35. Accept the default values, click OK
36. Click on the Integration Event hyperlink for your event
37. You will then be transferred to the same event details (View Background Process) page previously seen twice.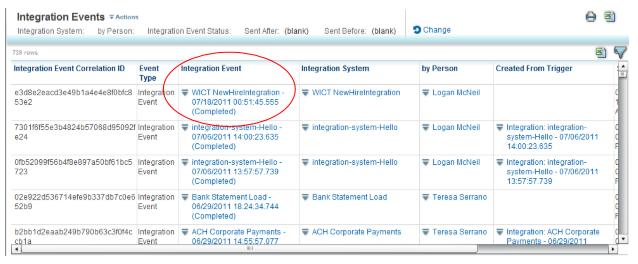
Hola peeps! Meet an adventure maniac, seeking life in every moment, interacting and writing at Asha24.

