What is Enterprise Interface Builder?
The Enterprise Interface Builder (EIB) allows users to perform simple and secure integrations with Workday. Unlike other Workday integrations, the purpose of the EIB, which uses no third-party software or hardware, is to allow customers to build their own integrations according to their unique business scenarios. Workday does, however, provide some packaged integrations with the EIB. The Enterprise Interface Builder can be used for both exports and imports:
| Direction of Integration | Description | Example |
| Exporting data | You can export report data from Workday to an external system in CSV and Microsoft® Excel® formats using the sFTP protocol, REST URLs, and email. | Export all active Workday employees in an Excel spreadsheet to E*Trade® Equity Edge® via sFTP. |
| Importing data | You can upload customer spreadsheet data via an attachment or from an external sFTP location. | Import an Employee Bonus data into Workday from an Excel spreadsheet that you provide to Workday in an attachment. |
The Four Elements Components of Integration:
- Integration System: This is central to creating integrations between Workday and an external system. An Integration System defines an external system in Workday: it provides both the security necessary for an external system to access Workday and a methodology to communicate data in a way that both Workday Web Services and the customer system understand.
- Data Source: This indicates what kind of data Workday will receive from an external source (for example, a spreadsheet of merit plan data) or will be extracted from Workday (for example, a particular custom report) and the location of that data (for example, a specific URL or FTP site)
- Transformation: This converts the data into something that Workday or the receiving external system can understand. Workday provides some transformations, but the “build your own integration” purpose of the EIB lies partly in the fact that users can create their own.
- Transport Protocol: This defines where, or to what endpoint, the Integration System will send the integration’s outgoing message/data/file. The method of delivery is also defined.
EIB Design Patterns 
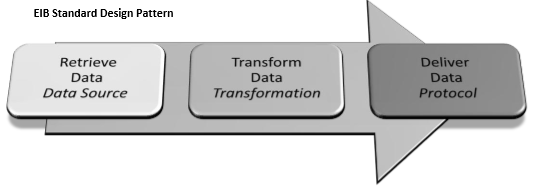
- Data Source: There are a number of options for retrieving data. They are as follows:
- Workday Custom Report
- Workday Standard Report
- Attachment o FTP(s)-based File
- Rest-based URL
Transformation: There are also multiple options for transforming data using the EIB. - Convert to a .CSV file
- Convert to an Excel Spreadsheet
- Custom XSLT
Transport Protocol: Workday also provides a number of different transport protocols: - email o (s)FTP(s)
- Workday Web Service API
- HTTP(s)
- Attachment
Now Let Create an Activity to Hire Employee Scenario: You are Harry, the Manager of IT Helpdesk in a fictitious company name Global software services, Inc. or GSS. You have several openings in your organization, which includes 2 IT Helpdesk Specialists and 2 Senior IT Analysts. All of the positions have been approved and you are ready to qualify applicants, track information regarding interview process and hire.
Process Overview Harry will perform the following actions:
1. Initiate and complete two hires, one effective today, and the other effective tomorrow
2. Create the compensation package
Tasks to Use
- Hire Employee
Steps: Sign in as Harry using the password you were provided Hire Process
1. Search for Robert
2. Click on the Related Action off of Robert’s name.
Select Hire > Hire Employee
| Field Name | Entry Value |
| Supervisory Organization | IT Helpdesk Department (search for IT Help) |
| Existing Applicant | Robert |
3. Click the OK button
4. Complete the hire information (leaving the Work Space field empty):
| Field Name | Entry Value |
| Hire Date | Today’s Date |
| Hire Reason | Select any New Hire reason you would like |
| Position | IT Helpdesk Specialist (Unfilled) |
| Employee Type | Regular (leave if it is the defaulted value) |
| Job Profile | leave the defaulted value |
| Time Type | Full Time (leave if it is the defaulted value) |
| Business Site | San Francisco (leave if it is defaulted value) |
| Pay Rate Type | Salaried |
5. The remaining fields (under Additional Information) are not required, so click the Submit button
6. Click the Open button under Next Steps on the confirmation page to Propose Compensation
7. On the Propose Compensation for Hire page, scroll down and click the Add Plan button
8. Choose Salary from the Compensation Plan Type dropdown list
9. Select General Salary Plan using the prompt for the Compensation Plan
10. Click OK
11. For Amount, enter 58,000.00
12. Leave the default of USD for Currency, and Annual for Frequency
13. Leave the default of empty (nothing) for the Expected End Date
14. Click the Save & Continue button
15. Verify the amount of 68,000.00 USD appears on the Propose Compensation for Hire page (it appears in several places)
16. Click the Submit button. Observe the Process Successfully Completed “check icon” appears.
17. Click the Close button on this confirmation page
18. Click the MY Team icon to see that Robert is now a direct report Based on the business process defined for the IT Helpdesk Department, the hire is complete. Hire a 2nd Employee
19. Search for John
20. Click on the Related Action off of John name. Select Hire > Hire Employee
| Field Name | Entry Value |
| Supervisory Organization | IT Helpdesk Department |
| Existing Applicant | John Abrahan |
21. Click the OK button
22. Complete the hire information, similar to above steps for Robert, except use tomorrow as the Hire Date (for the rest of the fields you can use the same values … for Hire Reason, Position, compensation Amount, etc.)

